I am generally excited to try out new software. This was the case when Apple announced the public betas for macOS Mojave recently. I was excited to try out the public beta, but I didn’t want to mess with my primary setup. Unfortunately, my older spare MacBook Pro is no longer supported by Mojave so my only option was using my primary MacBook Pro, which was a little scary. After looking around for a little bit, I learned that I could install Mojave on a new partition without messing much with the existing install.
Traditionally, I would have had to resize any existing partition to make space for a new partition where I would install the new operating system. With the last release of macOS High Sierra Apple introduced the Apple File System (APFS) which added the concept of containers. Containers have volumes that share the underlying partitions and support much more flexible resizing without having to mess with the underlying disk partitions.
Assuming you are using macOS High Sierra on an APFS partition, you can follow the steps below to easy make a new volume for a separate macOS Mojave install.
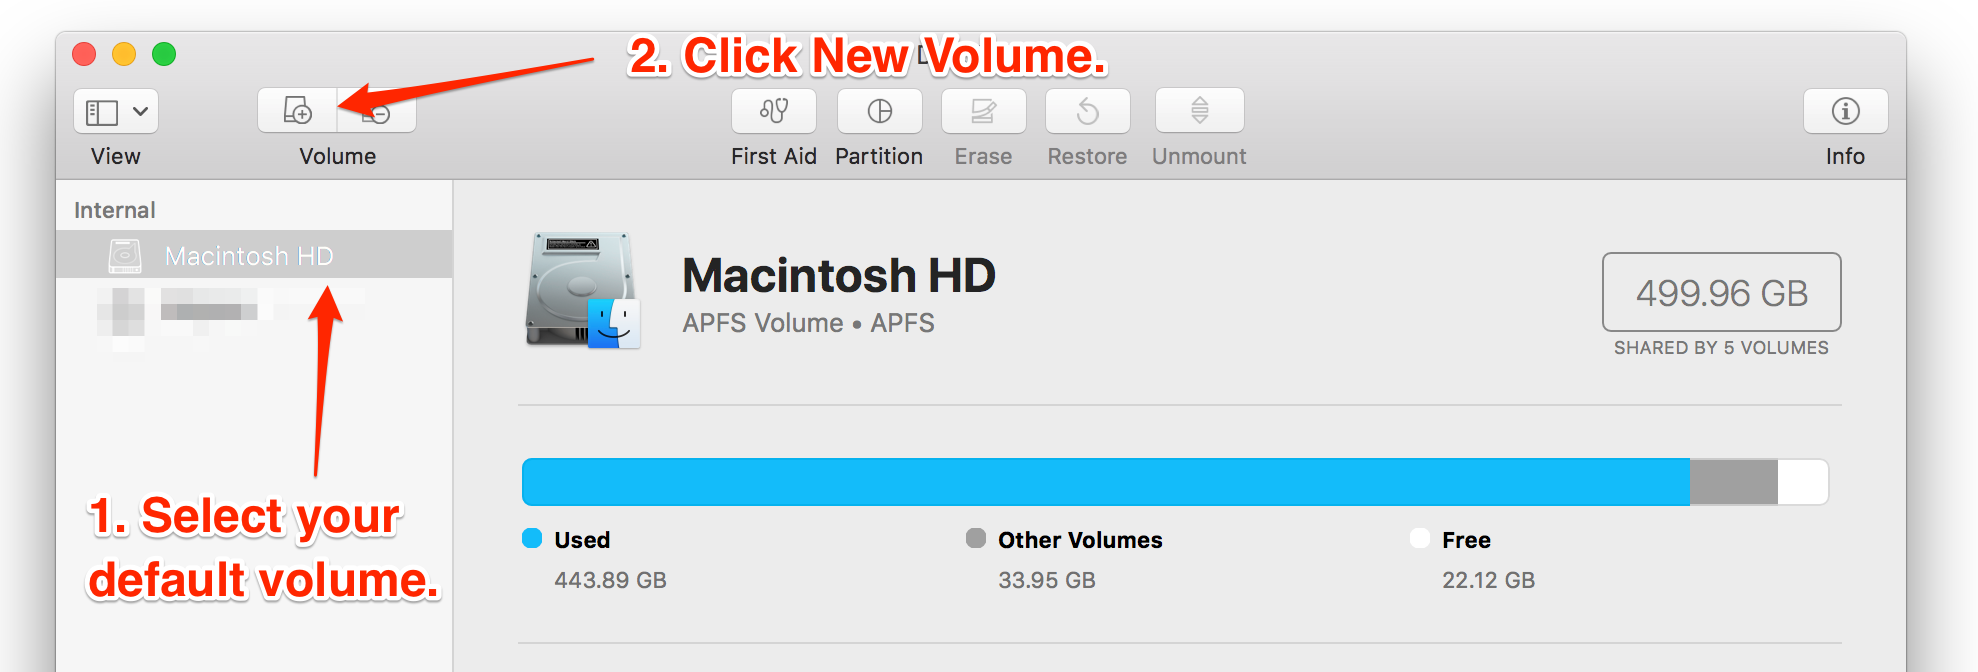
In Disk Utility (Applications > Utilities) select your current volume, which will be called “Macintosh HD” by default. Then click on the add volume button on the toolbar.
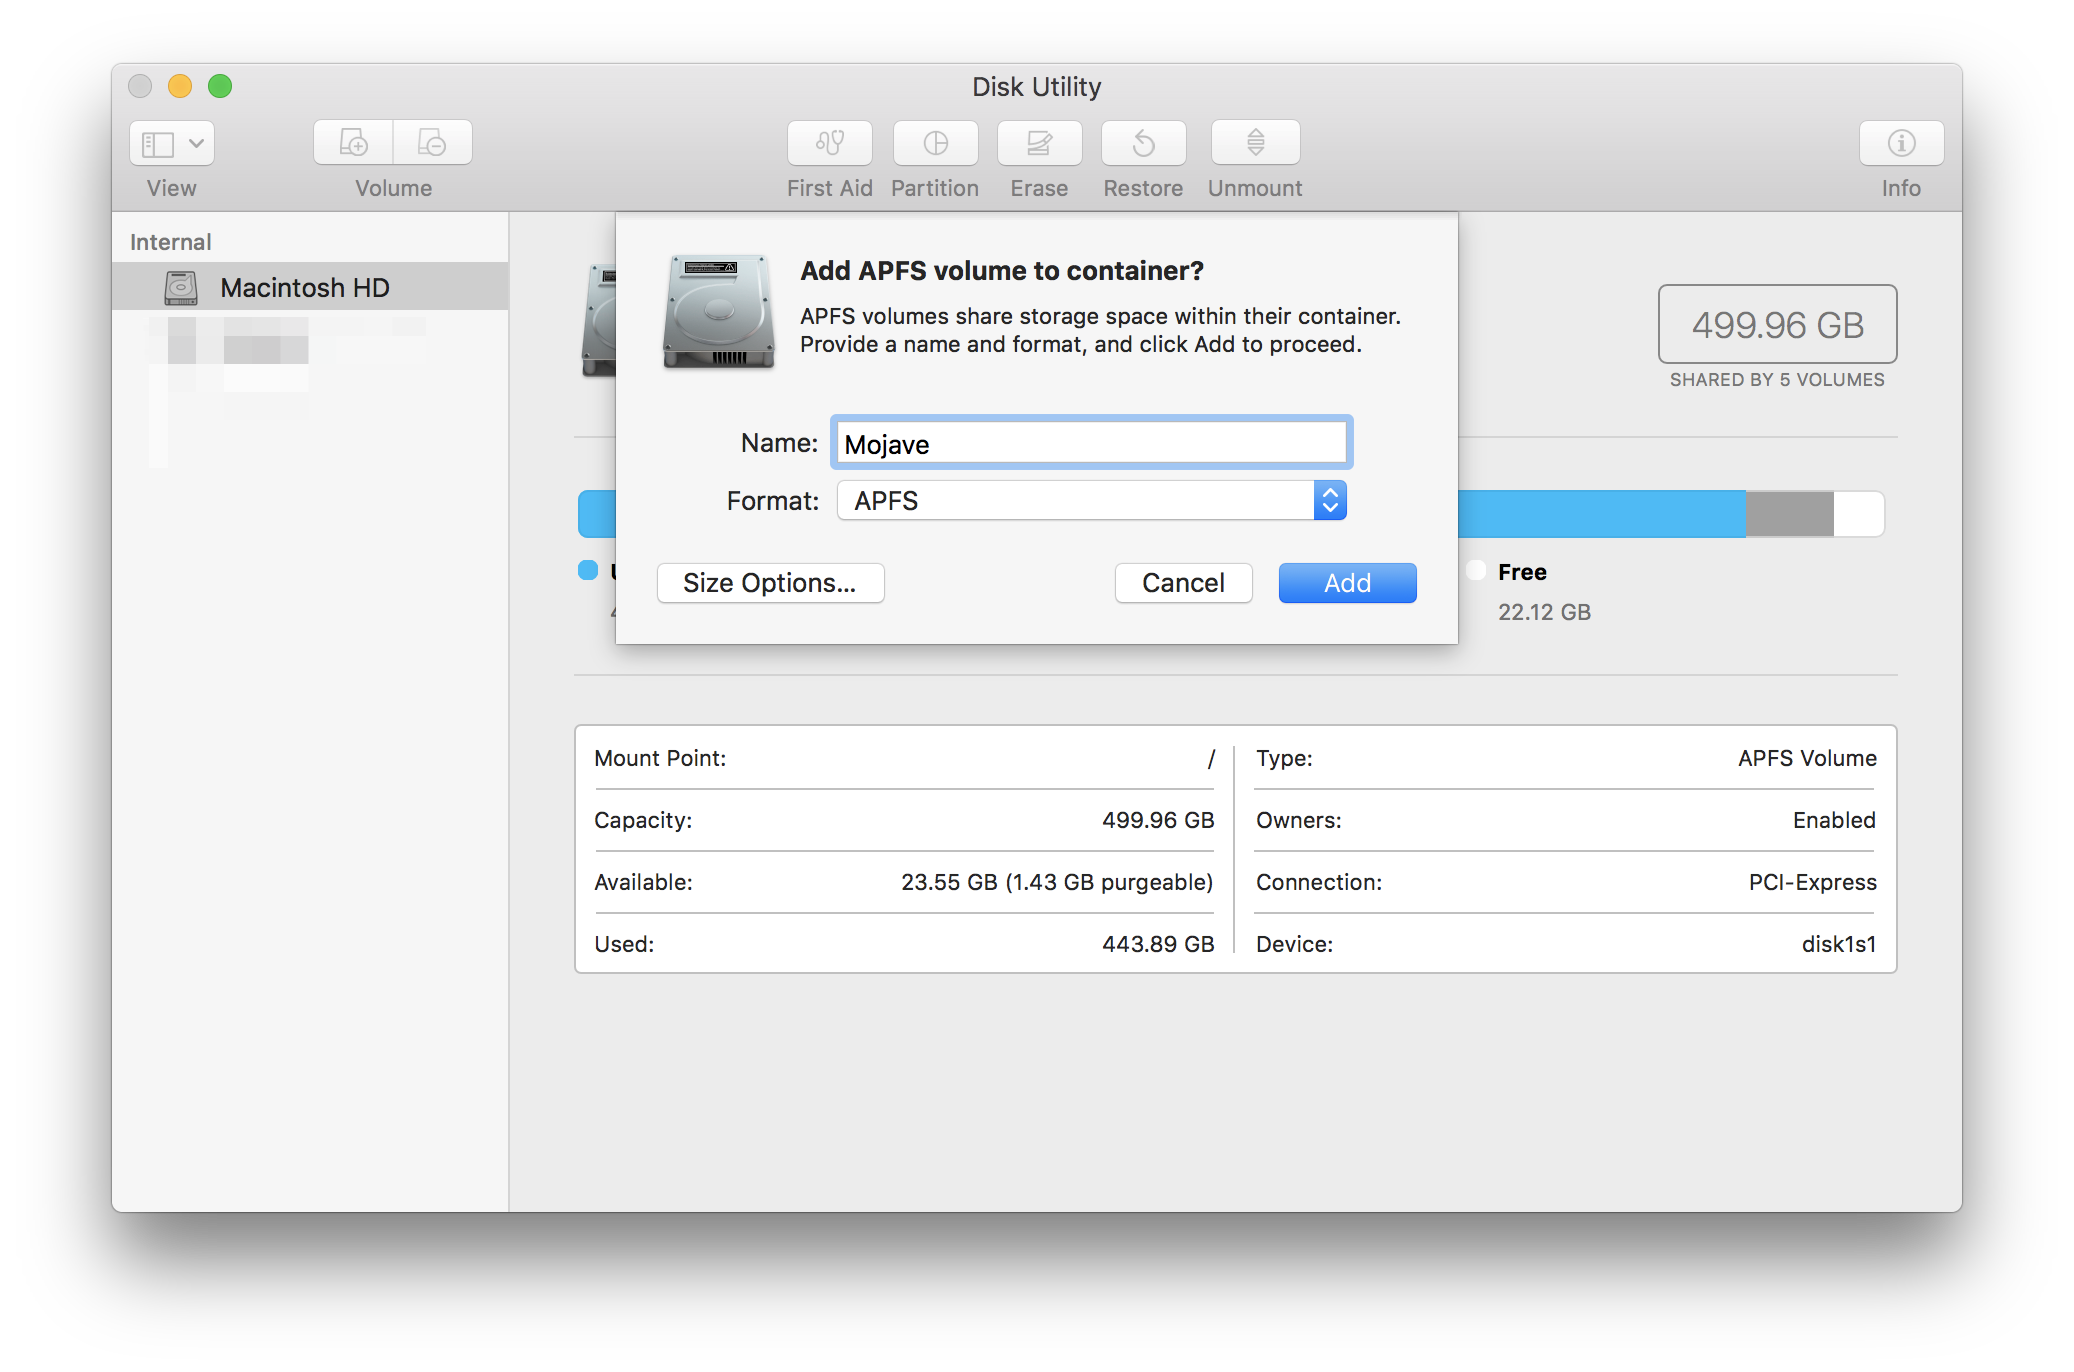
In the popup, name the volume whatever you would like. Take a look at the “Size Options…” if you would like to reserve a certain amount for this volume (not required). Then click Add to create the new volume.
Now you can download the Mojave installer by enrolling your macOS in the Apple beta program. When you run the installer, remember to select the new volume for installation and not your existing volume. Otherwise, there is not point in doing any of this 🙂
Now you can happily switch back to macOS High Sierra when you are done playing with macOS Mojave!